Brilliantprints Live Help

Posts Tagged ‘blur’

Seven Tutorials on Capturing Motion and Movement

motion

motion (Photo credit: sramtebilon)

Only two days back our post was about 100 photography tutorials spanning the gamut of topics and subject areas.  Today, we look at an article listing only seven tutorials but they concentrate on a single topic: capturing motion and movement.  Posted only last week on ePhotozine, these seven how-tos are the very best they’ve published on the topic.

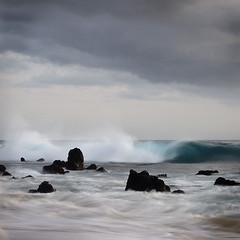
One usually associates landscapes with stillness and rest.  It may be a surprise, then, that one tutorial explains how to capture landscapes that show motion.  Though the now-common technique of showing water movement and blur is covered, there’s one possibility we automatically tend to shut out.  As the author puts it, “So often people worry about wind movement of trees and grasses spoiling their photographs, but why not emphasise it instead of stopping it . . .”  The author demonstrates this point with a luscious photo of a tree with that satiny long-exposure effect that is so commonplace for rivers and waterfalls.

The tutorial titled Add Action to Your Photos with Blur begins with the word ‘Contradictory’ – and that’s ironic, because, ‘contradictory’ to the title of this how-to, it offers a few fine tips on freezing motion!  The helpful tips on offer are many.  Pre-focussing, locking focus, and continuous shooting are a few of them.  This tutorial also goes into ‘zoom explosions’.

Though Add Action to Your Photos with Blur covers panning, Camera Panning Technique is dedicated to this subject.  What is most useful in this how-to are all the pitfalls that is exposes and even illustrates with example photos.  Read it and you’ll be forewarned of all that can go wrong so you can pan like a pro.

These three tutorials seem like the pick of the bunch but check them all out – your preferences may well be different.

In general, shutter speed, tripod, pan, ND filters, and strobe light is a basic checklist of sorts when you’re thinking ‘motion blur and movement’

Over and above the subjects presented in these seven tutorials, keep your eyes open for day-to-day situations that lend themselves to motion blur that captures the spirit of the moment.  For example, children at play and pet dogs and cats make wonderful subjects for capturing movement.


Enhanced by Zemanta

Achieving a Dreamy Effect : Photoshop Tutorial

 Photo credit: chylinski

 Have you ever wondered why some photos look ethereal and dreamy, like the swan photo above? It looks like it came straight from a scene in a fairy tale movie—softly lit, perceptive, fluid, vivid, and it touches something inside of you. You stare at the hints of light that gently touch elements on the photograph; you’re trying to convince yourself it’s a dream. But really, it’s not.
 
It’s just Photoshop.
 
Take a look at the original photo:


 It’s a good enough photo already, right? Although the story and composition can be improved (notice the badly cut reflection of the swan on the water), it makes a great photo of a swan spending her late afternoon dilly-dallying on the lake. To help you turn “simple” into “surreal,” here’s a tutorial on how to achieve a dreamy effect for your photos.
 

  1. Open your chosen photo in Photoshop. This effect works best with well-exposed pictures. You may first adjust brightness and contrast, or do any post-processing adjustment you wish to do with your photo.


  1. Create a new layer. From the menu, click Layer, New, and then Layer via Copy. Shortcut: Ctrl + J (Windows)or Cmd + J (Mac).


  1. A new layer labeled Layer 1 will appear on the Layers palette. This contains your foreground image, which is an exact copy of the background. You may rename your foreground layer if you wish to by double-clicking the layer name. In my case, I labeled it as Foreground.


  1. Making sure that the foreground layer is highlighted in the Layers palette, pull down the Filters menu and select Blur, then Gaussian Blur.


  1. On the Gaussian Blur dialog box, indicate the radius of the blur you wish to apply on your photo. The ideal scale value is when your photo is blurred enough to hide the details, but you should still be able to recognize the image behind it. Start with 5.0 and adjust from there. In the swan photo, I selected a value of 5.0 pixels.


  1. With the foreground layer still selected in the Layers palette, select the blending mode called Multiply. In this step, watch as your photo instantly turns into something new!


  1. From an ugly duckling to a glamorous swan, your photo has entered the world of dreams
This could already be the final image. However, depending on how heavily you want to apply the effect, you may change the blending opacity. By default, it is set at 100%. Move the opacity scale in the Layers palette to a lower value and see what you like best.


  1. Pull down the Layer menu and choose Flatten the Image. This will merge the two layers so that you have just one image.
  1. Finally, click File, save the image as JPEG and you’re done.


© 2025 Brilliant Prints

Are you a professional photographer or reseller?


Our Brilliant Prints professional site has 8 great products, useful resources and wholesale pricing.  ABN required.